Tuesday, August 26, 2014

Late summer garden tour

Although the calendar says August, in my garden it is just July. 

Here in Colorado the growing season at my elevation is shorter.  Spring can come as late as June and summer may only last a month or two.  My plants need to be hearty and they need to be fast bloomers. 

Let's take a tour of my garden in the last week of August, but first let me show you where we started.

Back in June this is what the garden looked like.


Just some purple Salvia, Bachelors Buttons, some Pansies and a few leftover bulbs.  The garden was just taking shape and waiting for sunny days, cool nights and rain.  Well we get lots of all of those things here in Colorado. 
 
Lets see how the garden looks now.  Let's start with one of my favorite garden flowers, the Dahlia.  They are bulbs that I planted this past April.  I love bulbs, you plant them, water them and they grow over and over.
Dahlia's are large flowers that are very brightly colored.


Aren't they beautiful! 
I also like to plant things that are self seeders.  Now these are plants that are sold as annuals - meaning they only bloom once and they are done, but self seeders, though an annual will grow again and again if you harvest and spread the seeds around your garden.  An easy self seeder to start with are Marigolds.  These little plants are not only a great pop of color but they replenish themselves season after season.  But be careful, one flower will produce about 20 seeds and they can take over your garden if you aren't careful.

As the buds dry up the seeds appear.  I will snip the dried buds and save them in plastic bags, spreading the seeds around to different placed in the garden, then covering them with some dirt for the winter.  In the spring I will water the ground and they magically come back! 

Another self seeder is the Cosmos.  At least that is what I call them.  They come in a variety of colors.  These long stemmed delicate flowers bloom once but will drop their seeds and regenerate themselves for next year.  I have them in several colors including dark pink, white and light pink.


I also like Bachelors Buttons.  They tend to grow in groups or cluster together.  These also self seed and will come up again and again if you are careful with the seeds.  I have them in blue, white and pink.
 
Another great flower that can be a self seeder but needs more care is the Pansy.  I love how they look like little faces... reminds me of the flowers in Alice in Wonderland.
Here in Colorado they will bloom all summer if taken care of correctly. 
Another great seed flower to get is a sunflower.  These large and bright flowers will come back year after year with little or no intervention from you.  HOWEVER, you need to plant the seed deeply.  These plants are tall growers and have heavy heads or blooms and if not planted deep will fall over if not given some sort of support.  I have several varieties, here are two. 


I also plant some perennials, these are like the bulbs that come back year after year if properly taken care of.  I have the purple Salvia.

 
I have a pink one in my front yard garden.  In the above photo you can also see the silver green leaves of my Queen Anne's Lace plant, another perennial plant.  This plant needs a bit of room to grow.  Mine has blooms that start out as yellow then turn white before they die off. I will cut the blooms as they die otherwise I think the plant gets a bit messy looking. 
I have also planted Honeysuckle and Clematis, both of these are vine plants, in other words they climb and I've got a black arch there for them to climb on. 
 
That is it!  My garden isn't large by any means but I just love puttering around in the flowers and going out every day to see what is blooming or going to bloom. 
Soon the garden will turn to fall and the flowers will begin to dry up and I'll be harvesting seeds like crazy.  For the fall I do have several Mums that should bloom again.  I can see them coming up out of the ground already.  Because we have a short growing season but are so sunny during the day my Mums bloom really late, usually October just when all the other flowers are done. 
 
This garden didn't happen overnight, I've worked on it for at lest 3 years.  I've moved plants around, dug things up and changed things.  I really want it to look like a wild meadow, full of different flowers at different times.  I think I'm close to achieving this. 
 
For a long view, this was the spring. BTW that large bush is a purple Lilac. 


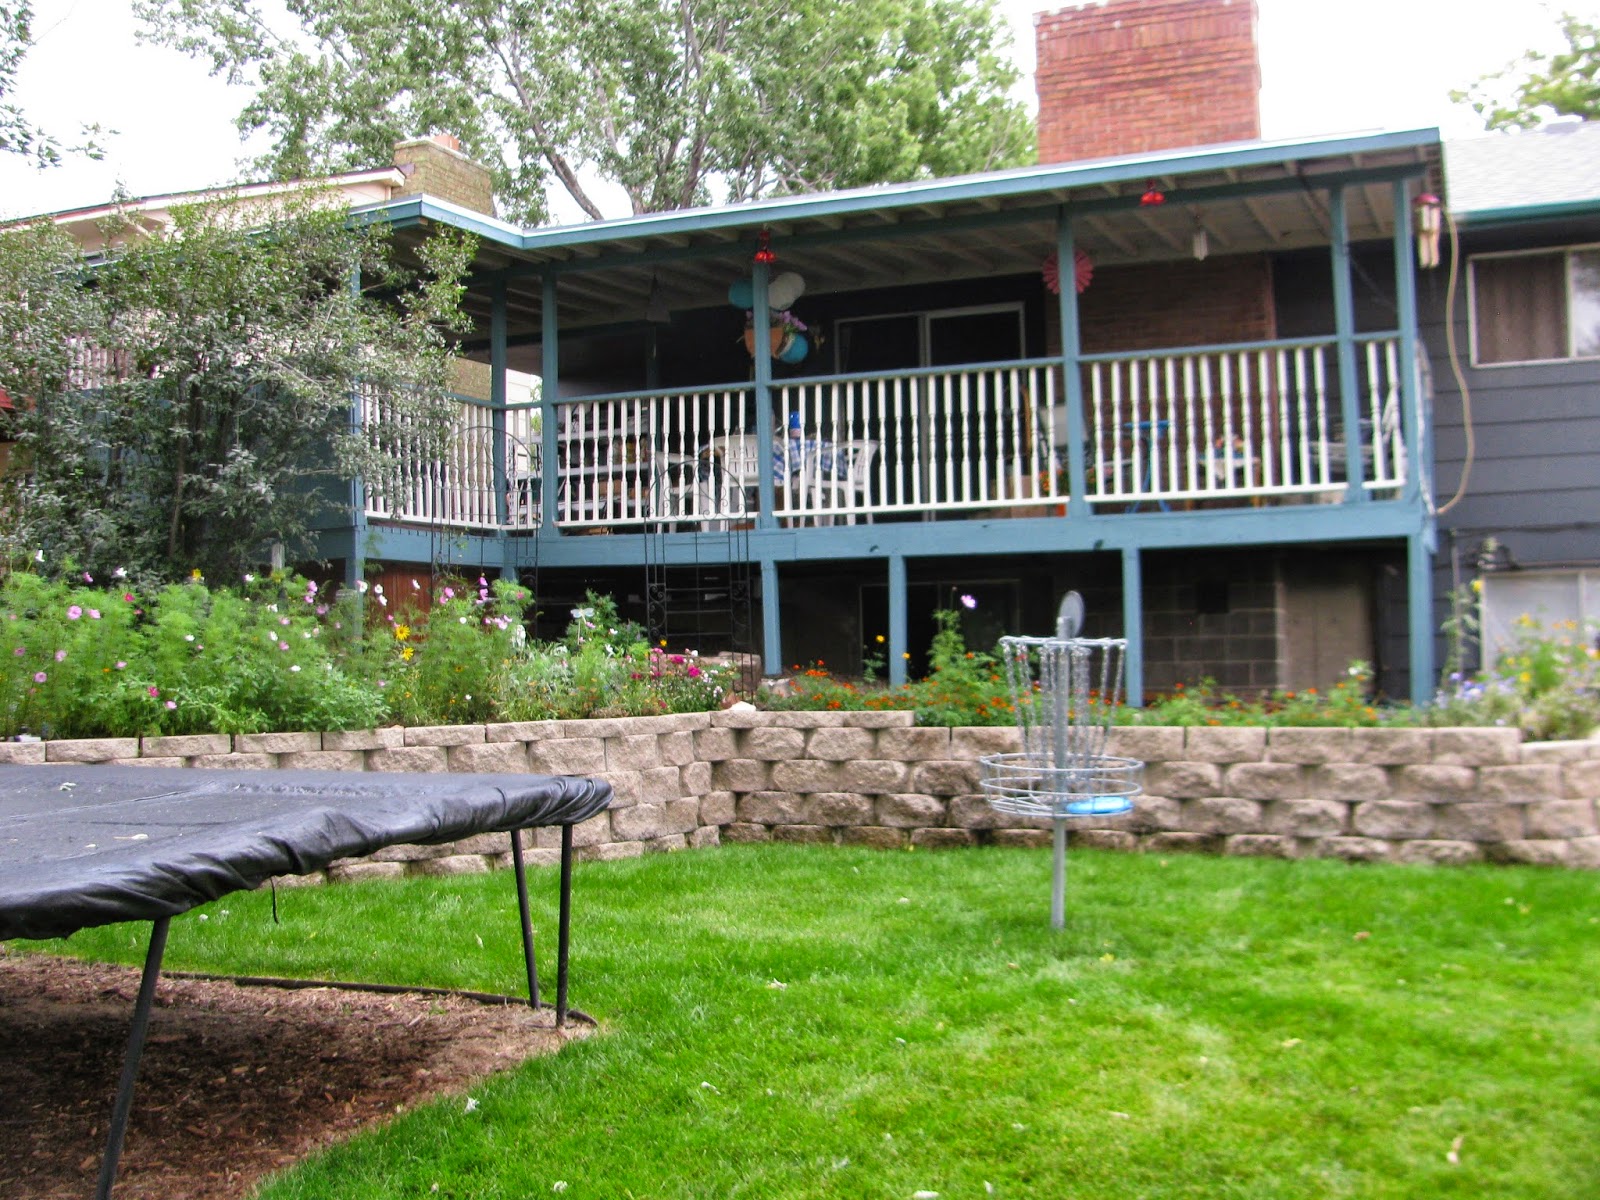
And this is the summer.

 
Thanks for stopping by!  If you have any questions about my garden I am happy to answer them. 
I won't be posting next week but I'll be on a bit of vacation with some out of town family coming to visit.  It should be exciting!  I always take my husbands Aunt on a adventure that ends up being crazy but so much fun.  Last year we went to Crested Butte Colorado and traveled over Kebler Pass to look at the Aspen changing.  The year before we traveled to Ouray Colorado and took a 4-wheel drive path to Yankee Boy Basin.  I think I'll tone it down this year and maybe we'll do a Segway tour of Peak 13 in Breckenridge Colorado! 
I'll be back the following week though and will start posting on Tuesday and Thursday.  I've got some Fall inspirations to talk about - for a sneak peak take a look at my Pintrest board - 'I love fall'.  I'll also have some cheap and as always, EASY fall crafts to do.  I'll be decorating inside and out for my favorite season and taking you on a fall home tour. 
Have a safe and happy Labor Day weekend... Labor Day already, where did the summer and the year go? 
Until then be safe!
Victoria
 
As always, you can follow me on Pintrest at -
 
And Facebook, though I am not as active here right now.  That will change starting next month -


Tuesday, August 19, 2014

Pintrest inspired craft

So I'm still on my Pintrest inspired or Pintrest completed crafts.  Today I am sharing a set of wood blocks that you can make and customize for your own décor and any season. 

Here is the original Pintrest pin that inspired this craft.
http://jessicaslife81.blogspot.gr/2012/09/fall-home-decorating.html

There are no specific directions on how to do this craft but it is easy enough to figure it out.  If you want to do the door or wall hanging, I would use Balsam wood.  You can get it at any craft store.  I chose to make blocks instead. 

Here is what you will need for my version:
  • Blocks of wood, one for each letter of what you are spelling.  I used a 'junk' 2x4 that we had in our stack of wood we 'shouldn't throw away because, see we can use it' pile. 
  • Craft paper.  I used a different color for each block of wood
  • Craft Glue
  • Modge Podge
  • Scissors
  • Block letters that will spell out whatever it is that you want to say
  • Glitter
  • Embellishments
  • Sanding paper or a sander to smooth the rough edges of the wood
  • Pencil
  • Level or square
  • Saw to cut your wood
  • Several paper plates - 1 for your Modge Podge and 1 for glittering each letter
  • Paint brush or sponge


Step 1 - Determine how large you want you blocks of wood.
I chose mine to be only a bit larger than my letters but you can make yours any size.  (You could even use 1 large piece of wood and write your entire word on 1 piece). 


Step 2 - Using your square or level and your pencil mark off where to cut your pieces of wood.


Step 3 - Cut your wood


Step 4 - Sand the sides and any rough edges of your wood


Step 5 - Wipe of your wood with a damp paper towel - this is to remove any sawdust that may be on your piece


Step 6 - Determine where and how large you want your craft paper.  I chose to have mine smaller than the piece of wood.  Mark your craft paper where you want it cut.

Step 7 - Using your level or square draw a line where you want your pieces of craft paper cut and cut your paper.


Step 8 - Using the Modge Podge, pour some out on one of your paper plates. Using the paint brush or sponge, paint the one side of your block.  You should paint the Modge Podge on the side you want your craft paper on.

Step 9 - Place your cut craft paper on top of the painted block and try to smooth out the edges. 


Step 10 - Using the Modge Podge and paint brush or sponge, paint a coat of Modge Podge over the top of the craft paper, cover it completely. 


Step 11 - Place your blocks to the side, they need to dry completely.  I let mine dry overnight.

Step 12 - Using your paper plates - 1 for each letter begin the process of covering them with glitter.  I used the Modge Podge and painted the correct side of each letter while on the paper plate then sprinkled the glitter over each one.  Set these aside to dry well. 


Step 13 - Once your blocks are dry and your letters are dry you need to glue the letters to the blocks.  First determine where you want the letters to sit on each block.  Then using the craft glue, glue the letters down on the blocks.


Step 14 - Embellishments - Now you can add any embellishments you wish.


Step 15 - Display! 
I know this seems like a lot of steps but it really isn't and the craft is pretty easy to do!  If you want to complete the wall or door hanging like in the original pin you'll need ribbon and some kind of punch to poke holes in the tops and bottoms of the letters. 

I like this craft because you can customize it to whatever season or saying you wish!  Have fun with it. 

Thanks for stopping by!  I appreciate you reading and checking the blog out! 
As always, you can follow me on Facebook - I only post when I post here on the blog.  During the summer that is Wednesdays.
https://www.facebook.com/pages/Dragonflies-and-Thistles/491393717621010

You can also follow me on Pintrest, I am much more active here.
http://www.pinterest.com/vicdenniso/

You can always follow me right here on the blog! 
http://www.dragonfliesandthistles.blogspot.com/

Have a great week.  Next week I'll be sharing my late summer garden before I go on a small vacation.  See you next Wednesday!  Be safe! 
Victoria

Tuesday, August 12, 2014

Pintrest Challenge, Bacon wrapped Tater Tot's!

I have challenged myself to do at least one thing a week off one of my Pintrest boards.  If you are like me, you've been 'pinning' away but not acting on any of those pins.  Well starting now I'm going to do something about it! 

Last Friday was my Father-in-Law's 65th birthday.  I was tasked with providing appetizers.  I thought, "this is a great time to start my Pintrest challenge and find something off my food board to bring!" 

I was excited to bring appetizers, I LOVE appetizers.  Heck I could make an entire meal from appetizers!  Plus it is a really cool word, APPETIZER! 

Anywho, I searched the food section of my Pintrest board and found a recipe for bacon wrapped tater tots.  Yep.  What could be better than bacon and potato!

Here is a link to the original recipe, yes as a bonus, the Pintrest link worked! 
Here is the 'Pin'
http://www.pinterest.com/pin/193865958934814925/
And here is the link to the site I got the recipe from..
http://www.madefrompinterest.net/2013/09/bacon-wrapped-tator-tots-bombs-appetizer/

Let me tell you... GOODNESS these are good.

OK bad news first.  This takes a bit of time to put together and it is messy.

Pintrest fail - The original recipe calls for shredded cheese, then you dig a hole in the tot and push the shredded cheese in then cover it back up.  BIG FAIL.  I have very small hands and I couldn't do this.  Plus realistically who has time for all of that?  If you can figure it out then good for you!  Instead I got a block of sharp cheddar (you could use whatever kind of cheese you like or skip the cheese all together) and cut it up into little tiny pieces, pulled the tots in half, stuffed a piece of cheese in there and pushed them back together.

You will need.
1 bag of Tater Tots.  I bought the extra crispy but you can buy whatever kind you like
1 package of bacon
Cheese.  Again, the recipe calls for shredded, I gave up and got a block and cut them into little pieces
1cup of brown sugar
Dipping sauces - this is optional.  I used Beer cheese, salsa - 2 different kinds, and BBQ sauce. 

Now assemble your items.
Preheat your oven to 400
Spray a cookie sheet - REALLY WELL! 
De-thaw 1/2 your bag of Tater Tot's
Cut your bacon in half.  I just used a knife, opened the package and cut the bacon in half. 

This is my cheese, I cut them in half again.

Now break your Tot in half

Stuff a small piece of cheese inside and put it back together.
Now roll it in a piece of bacon and place it seam side down on your cookie sheet.
I did as many as I had bacon for, it was quite a few, it filled my cookie sheet.  After this you want to spread your cup of brown sugar out on a plate. 
Next you are going to take each bacon wrapped tot and roll it in the brown sugar.  Replace them on the cookie sheet, seam side down.

When you have rolled all the tots in the brown sugar, place the cookie sheet on the top rack of the oven at 400 for 20-30 minutes or until the bacon is crisp. 

They are good on their own but really good in dipping sauce.  I used a jar Beer Cheese, two kinds of salsa and barbeque sauce. 
Needless to say they were the hit of the party!
I hope you try them! 

Next week I'll be talking fall. I've been pinning to my fall board like crazy and I've got several ideas for fall decorating.  I can't wait to share that and whatever I pick to complete off one of my Pintrest boards! 
Have a great week.  As always thanks so much for stopping by.  I hope you try the bacon wrapped tots.  Till next week, be safe!
Victoria

As always you can follow me on Pintrest -
http://www.pinterest.com/vicdenniso/

I'm also on Facebook, though not at active as I am on Pintrest.
https://www.facebook.com/pages/Dragonflies-and-Thistles/491393717621010

You can also follow me here, directly on the blog at..
http://www.dragonfliesandthistles.blogspot.com/

Tuesday, August 5, 2014

Shrimp on the barbie

I love seafood.  Growing up on the east coast of the United States, seafood is a way of life.  I grew up right on the Chesapeake Bay where all kinds of seafood is abundant. 

One of my favorite's is shrimp.

You can cook shrimp many ways, boil, stir fry, bake and even on the grill.  I've done this recipe inside on my indoor grill and when the weather permits, outside.  It is easy and you can change the ingredients to whatever you like. 

So for Victoria's shrimp on the barbie you will need:

 - Shrimp - I bought a bag of pre-cooked, frozen.  Jumbo size
 - Skewers.  I have metal ones that I bought at BB & Beyond.  You can use wooden, if you do you will need to soak them for at least 30 minutes in cold water.  Otherwise they will burn.
 - Seasonings.  Your choice here, pick things that go together.  I used Old Bay, honey, lemon juice, salt, pepper, red pepper flakes, natural coconut and dried chives. 
 - Liquor.  Again your choice, the alcohol will burn off so it is the flavor you want.  I used whiskey but you could use tequila, lemon cello or a flavored rum, vodka or wine. You could also skip the liquor and use barbeque sauce, jelly, marmalade or a jam.  I think orange marmalade or jam/jelly would be fantastic on the shrimp! 
 - A small bowl
 - A whisk
 - A brush to brush your seasonings onto the shrimp.
 - A hot pad or oven mitt
 - A plate
 - Non stick cooking spray

First and foremost, start your grill and get the burners going.  I have an old grill without a temperature gauge but I put the flame on what I consider medium heat.

Place your froze shrimp in a colander and run it under cold water.  You just want to de-ice the shrimp and start the de-thaw process.  If you bought fresh shrimp make sure they are peeled and de-veined as well as washed under cold water.  Let the shrimp drain then pat them dry with a paper towel. Set the shrimp aside.

Next, in a small bowl assemble your ingredients.  For my bag of shrimp I used the following:
1/4c of honey
1/4 c of whiskey
1 TBSP of Old Bay (this is a seafood seasoning)
1 tsp. lemon juice
1 tsp. dried chives
1/2 tsp. red pepper flakes
1/2 tsp. natural coconut

I then mixed the ingredients together with a whisk until the honey was dissolved.

If you are using metal skewers like I did make sure you spray them with a non-stick spray. 
Now you are ready to assemble the shrimp.

Taking a shrimp you skewer it through the meatiest part of the body then through the shrimp again near the tail.  I put 4 -5 shrimp on each skewer.  Do not squish them together, let them breathe on the skewer! 

Now lay all the skewers on a flat surface and salt and pepper each side of the shrimp.
You are now ready to grill!  Make sure you have a hot pad or oven mitt as the metal skewers get hot and the wooden ones may need to be picked up directly from the grill.

Place your shrimp on the grill as evenly spaced apart as you can. I put mine on an angle.  Using your brush, dip it in your bowl of yummy honey/liquor seasoning and brush the shrimp liberally on one side.  Close the lid of the grill and check them every minute to make sure they aren't burning and that you don't need to lower your flame. 

After 3 minutes, use your oven mitt or hot pad to flip the shrimp.  Repeat the brushing part - liberally you really want the shrimp to get all that good seasonings.  Close the lid again for another 3 minutes. 
Fresh shrimp may take about 4 minutes on each side - you be the judge, nice bright pink/orange shrimp are ones that are done!  For the pre-cooked and frozen you just want to make sure they are heated through. 
After they have cooked, using a fork slide the shrimp off each skewer and enjoy! 
I like this recipe because you can change up the seasoning.  I've made them using tequila and lime only.  I've made them with orange marmalade and chopped grilled peaches - yummy in my tummy!  If I've got smaller kiddo's around I will possibly make them using barbeque sauce. 

Again, here are the steps.
1 - Prepare your shrimp by either de-icing or peel and de-vein.  Rinse them under cold water then pat them dry with a paper towel
2 - Start your grill!
3 - Prepare your seasonings


4 - Skewer your shrimp
5 - Salt and pepper each side of the shrimp
6 - Place the skewered shrimp on the grill and using a brush and your seasonings liberally brush each side of the shrimp.  Remember each grills cooking times vary so keep a watch to make sure you don't burn the shrimp.  I did my pre-cooked shrimp for 3 minutes on each side on medium heat.
7 - ENJOY! 

I hope you give this recipe a try.  It is fairly easy to do and doesn't take a lot of time or effort for something that is a tasty treat! 

As always, you can follow me on Facebook at -
https://www.facebook.com/pages/Dragonflies-and-Thistles/491393717621010

I'm also on Pintrest (and much more active here) -
http://www.pinterest.com/vicdenniso/

You can also follow me directly here on the blog at -
www.dragonfliesandthistles.blogspot.com

Thanks so much for stopping by.  I'll be back next week with some ideas for fall decorating, yes I am already thinking fall! 
Till then, be safe!
Victoria